


Cinema Sign 3 deployment
From spare screen to cinema sign.
A repeatable checklist for Android TV devices, Fire TV sticks and dedicated signage networks.
Prepare the device
Enable developer options and ADB, connect the display, enable HDMI-CEC where supported, and choose a stable wired or signage Wi-Fi network.
Install Cinema Sign
Install the signed release APK, launch once, enable start-on-boot/background operation and open the administration address shown on screen.
Select cinema data and region
Use the included demo source first, then configure CinemaShowtimes, VenueMaster, BLOAD.TXT, Veezi, manual sessions or another Cinema Sign player. Test supported endpoints before saving, then select the cinema’s Classification Region.
Prepare media
Configure d-cine access, review matches, upload overrides and confirm posters/trailers are cached before public display.
Synchronize or share data
Permit UDP port 39427, disable client isolation and check clock master, offset and round-trip status. To avoid configuring the same cinema feed repeatedly, nominate one Cinema Sign master on port 8888 and point follower players to it for data and media.
Operate and update
Schedule display hours and nightly application maintenance, monitor storage and publish signed APK releases to the HTTPS upgrade repository.
NVIDIA Shield quick install
Install directly over the internet.
You do not need a USB drive or a computer beside the screen. Use the free Downloader app on the Shield to open the Cinema Sign release page and install the APK.
Install Downloader
Open Google Play Store on the Shield, search for Downloader by AFTVnews, and install it.
Open the download page
Launch Downloader and enter the Cinema Sign address below. Select the latest release and choose Download APK.
Allow this installation
If Android blocks the installer, select Settings, enable Allow from this source for Downloader, then return and select Install.
Required: allow display over apps
Using the Shield remote, open Settings → Apps → Special app access → Display over other apps → Cinema Sign and enable Allow display over other apps. This allows Cinema Sign to bring its player screen to the front after a boot.
Required: disable energy optimization
Return to Settings → Apps → Special app access → Energy optimization → Cinema Sign and turn optimization off. The permitted state may be labelled Not optimized or Don’t optimize.
Required: enable Start on Boot
Open Cinema Sign manually at least once. In its web administration, select Settings → Device → Start on Boot → On, then choose Save and restart player.
Test a Shield restart
Restart from Settings → Device Preferences → Restart. Cinema Sign should open after Android starts. Recheck special access if a Shield update resets it.
www.d-cine.net download page.admin and
password d-cine. These are shared installation defaults, so keep the player on a
trusted local network and never expose its web interface directly to the internet.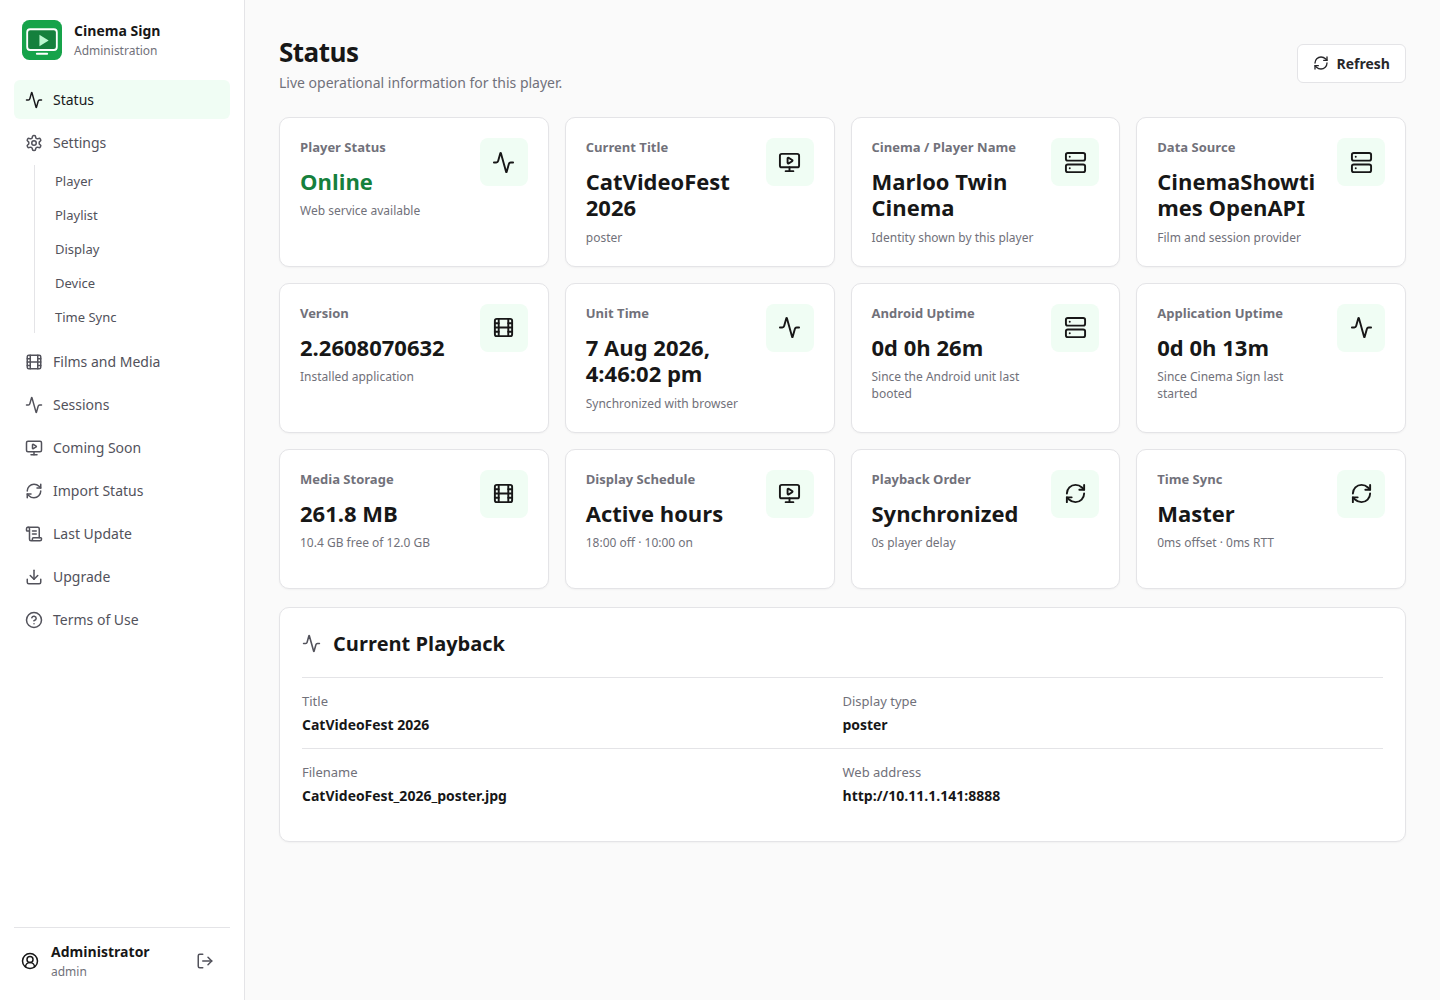
Quick start
Start with the public demo.
On Player Settings, select Set demo source and confirm. Cinema Sign selects CinemaShowtimes OpenAPI and imports:
The demo endpoint is public and intended to make a fresh installation useful immediately.
Recommended pilot
- One player and one display mode
- Seven days of unattended operation
- Display sleep/wake verification
- Media/storage review
- Only then add synchronized screens
Local presentation
Select the correct classification system.
Open Settings → Display → Classification Region. Cinema Sign includes artwork for Australia, Canada, France, Germany, Hong Kong, Iceland, India, Japan, Netherlands, New Zealand, Norway, Singapore, South Korea, Spain, the United Kingdom and the United States. Select Disabled to remove classification icons and let session text use the space.
Hardware notes
Know the platform limits.
Retail Fire OS restricts certain system-level power and HDMI controls. Cinema Sign reliably restarts its own application for nightly maintenance. Test physical screen sleep/wake behaviour with every television model and follow the repository’s Amazon Fire TV ADB procedure.
For network and command details, see AMAZON_FIRE_TV_ADB_SETUP.md in the source
repository.